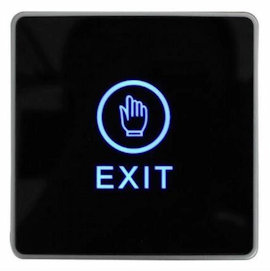
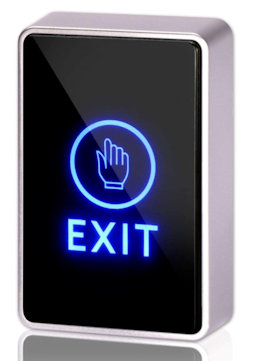
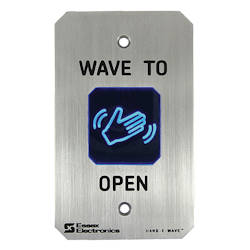
No touch switch, no touch door handle for visitor to exit your office.
Operation
Simply wave your hand in front of the wall switch to open your office automated door.
No contact to the switch and the door.
Contactless exit door switch suitable for
Magnetic door
Door strike lock open
Automated gliding glass door
Automated swing door
Easy to connect, easy to use.
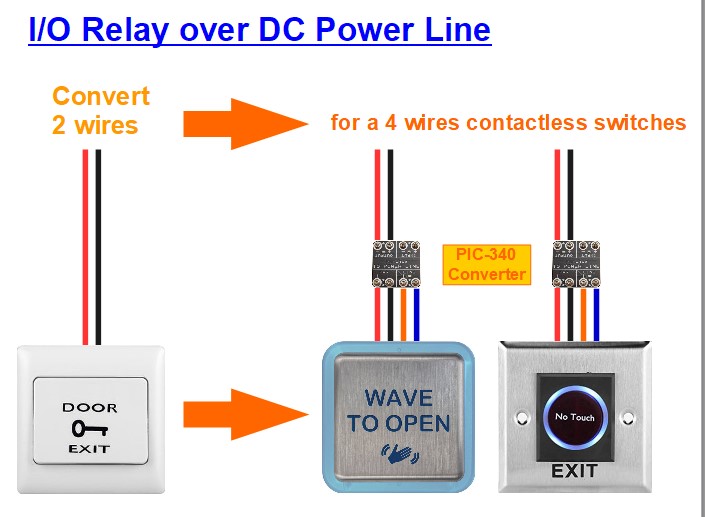
Installation of Contactless Switch using only 2 wires
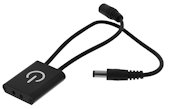
Check out our converter product to install your contactless switch using only 2 wires from your existing cable installation from your 2 wire passive exit door wall switches.
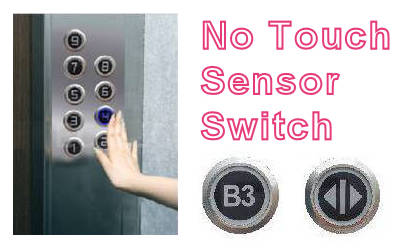
Elevator lift has a high probability of human to human transmission of virus and germs. Introducing our touch-free button. Solution to select the floor to go to without physically touching the lift buttons.
Benefits
Putting your guest at ease with touch-free touchless button.
Reduce manpower and frequency to clean the elevator lift.
More hygienic and reduce spread of gems and virus
Operation
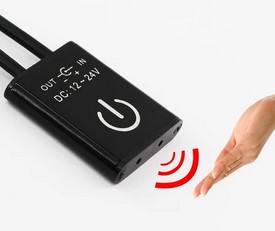
This touch free switch is simple to use. The user simply place their finger about 20-40mm away from the surface of the touch-free button switch, the sensor will detect and activate the switch just like a normal touch button on the elevator lift.
Touch-Free Button Video Demonstration
Touch free elevator lift button demonstration
Touch free elevator floor level button
Features
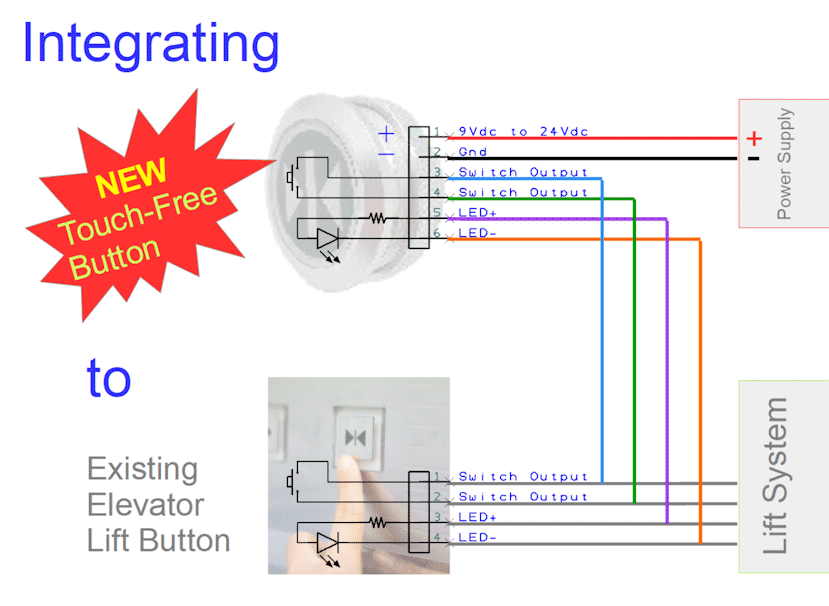
Very low power consumption (less than 40mA) a minimum of 9Vdc, 12Vdc to 24Vdc.
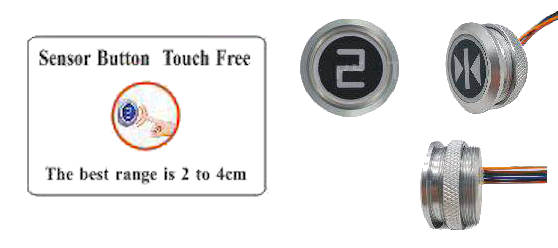
Infra-red sensor technology to detect finger from a distance of 20 to 40mm.
Strong and durable aluminum case.
Water and Dust proof.
Normally open dry contact switch output.
Easy to integrate to elevator lift, as well as other electronic equipment.
Button indicator (blue color)
Square Touch Button Switch
Round Touch Button Switch
Installation
The installation is simple. It is design to be compatible to all evaluator lift system.
Switch is dry contact and can easily to integrate to any existing elevator lift system or other electronic/electrical system that uses switches to operate.
You can install the switches as additional operating panel without removing your existing lift button panel. It is that simple.
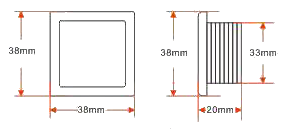
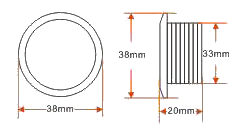
This touch-free switch can easily fit into a wide range of pre-cut control panel holes from Ø33mm to Ø37mm. Standard switch diameter size are 32.5mm and 35.6mm.
The button can operate with voltage input between 9Vdc, ,12Vdc to 24Vdc. (Can be as low as 7Vdc).
The power consumption of the switch is very low, within only 40mA. When operating power 12Vdc to 24Vdc, the button current consumption is at 3.4mA (standby) and 26.7mA (when activated). The LED current can be from about 3mA (for 12Vdc) to about 9mA (for 24Vdc)
The following wiring diagram illustrate how you can connect this touch-free button to any existing elevator lift system. This touch-free button has a built-in mini mechanical relay to replicate a typical mechanical switch in a life system This makes it easy for this touch-free button switch to be installed with any electronic equipment or system.
Our engineer can support you for your installation.
Contactless switches and touch free buttons to give visitor a sound piece of mind.
Touch Free Button for Elevator Lift
Our touch free button specially design for elevator lift. Simply place your finger in front of the sensor switch to select the floor level that your visitor wants to go.
Keep your visitor feeling safe and reduce the need for frequent cleaning maintenance.
Custom Solution for Touch-Free Contactless Interfacing
Looking for a solution to allow your operator to interface and interact with your equipment to minimise touching or contamination of the surface. Go for contactless electronic switch today.
Email us today.
We can custom build a solution specially just for your application.
The reason I am doing this page is because I find development work using SEGGER IDE is really painful. It is really not a fun IDE to work with. Maybe in future, it will be better. But for now, I have a project to do, and I cannot spending time on a lousy development environment, knowing how fast it would be using a good IDE platform.
It is fortunate enough that a kind soul had developed a “GNU ARM Eclipse plugin” for development of ARMS firmware, currently supprted and maintain by Liviu Ionescu. While SEGGER does not support this plugin, it is recommended by them for developer who refer to use a better development environment for their programming. https://www.segger.com/products/debug-probes/j-link/technology/ides/eclipse/
The only disadvantage is that the developer would not be able to use the SEGGER debugging function. Being a developer, I seldom find the need to use a debugger, nor I understand how important a hardware debugger is. I don’t find it very useful so far, and managed to turn out many projects without using it. Perhaps there is a better purpose of using a debugger that I did not understand.
This is my attempt to setup Eclipse IDE for ARM Cortex firmware development work. I hope this works as it can increase my productivity tremendously. I really have a lot of blocks using SEGGER IDE, after working with many better other IDE products.
Setting Up Eclipse IDE for ARM Cortex Microcontroller development work.
Download and install the Eclipse IDE. (for C/C++ Developers)
Open the Eclipse program, go to the menu Help -> Eclipse Marketplace…
Search for “GNU MCU Eclipse” plugin, or go to this page https://marketplace.eclipse.org/content/gnu-arm-eclipse to drag the install button onto the Eclipse Marketplace dialog box. Click the <Confirm> button to install the plugin.
This guide provide a certain direction to learn and understand about Bluetooth BLE using Nordic tools and microcontroller.
The learning process with Nordic product can be very overwhelming. This guide provide a means to understand Bluetooth progressively.
Read the book “Inside Bluetooth low energy” by Naresh Gupta This book contains all the technical names of Bluetooth. It is important to know that these names exist. You do not need to read this book in detail for a start. Just a brief read-through of the features available in BLE. You will need to be aware of the wording convention used in Bluetooth Low Energy. Just be aware of the terminology used in the book as it is very helpful when you navigate with the following tools and working with the source-code in nRF SDK. This book can act as a dictionary for you to understand what those terms mean. Another book is “Getting Started with Bluetooth Low Energy: Tools And Techniques For Low-Power Networking” by Kevin Townsend. The content is more relevant to Nordic microcontroller chip product.
This is a 230Vac motorised roller shutter installed in a kitchen of the HDB flat. The shutter is open to allow natural air breeze to come in. When it rains, this shutter is automatically closed with the help of the rain sensor and a controller.
Shutter Open
Shutter open
Open shutter door to allow fresh air and breeze into the house.
Shutter Close
Shutter close
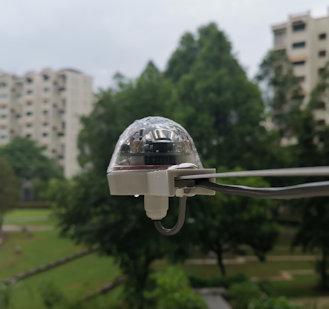
Shutter is automatically closed when rain water drops is detected by the rain sensor which is installed right outside this shutter.
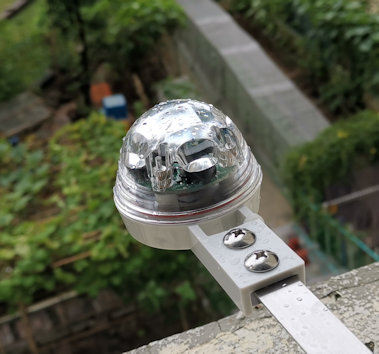
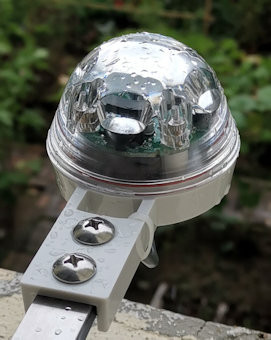
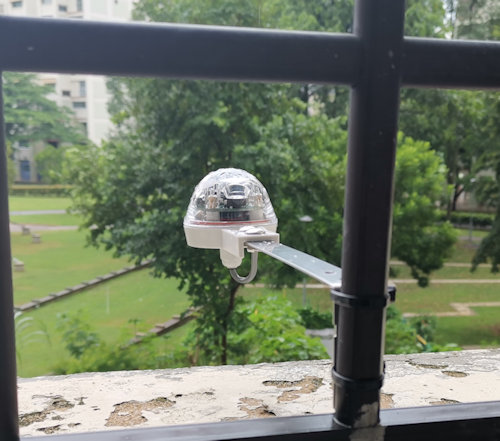
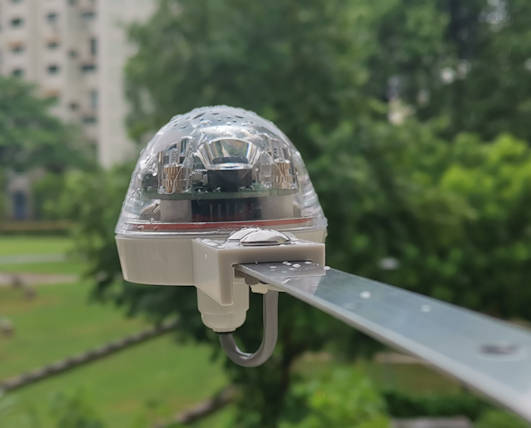
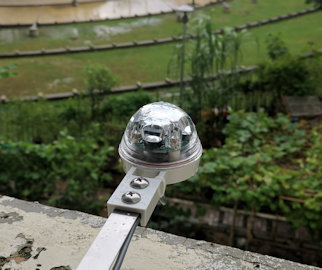
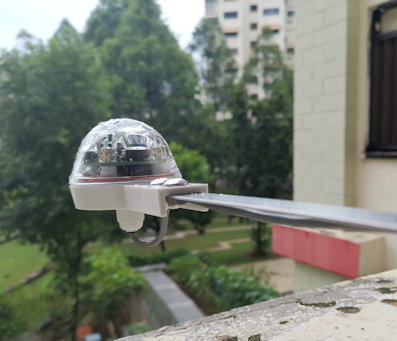
Rain sensor mounted outside the window grill.
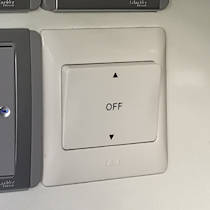
Wall Switch for Shutter
Wall switch for manual overwrite of the roller shutter up/down control
Manual Mode
The user can use the wall switch to manually control the shutter by pressing the up or down switch.
Auto Mode
Leaving the switch in the middle will leave the system in the automatic mode. This means the rain sensor will be in control.
When it rains, the sensor will close the shutter. When there is no rain for a period of time, the sensor will automatically open the shutter.
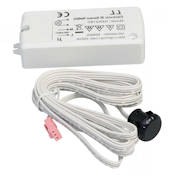
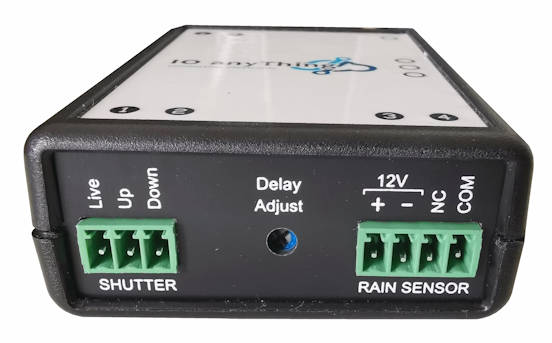
Rain Sensor Controller
Controller for Raini Sensor
A rain sensor controller interface between the rain sensor, the motorised roller shutter, the wall switch control panel and the electricity power.
Depending on how fast you want the sensor to be activated, the sensitivity of the sensor can be adjusted. In typical installation, we will set it to the most sensitive.
A custom mounting bracket can be use to extend out the sensor. This will help the sensor to activate the shutter close earlier before the rain gets splash into your home.
Rain sensor is extended out from the wall to detect the rain outside.