Install Mini-Core
Install Mini-Core following the instructions given on their githhub page:
“https://github.com/MCUdude/MiniCore#how-to-install“
This installation method requires Arduino IDE version 1.6.4 or greater.
- Open the Arduino IDE.
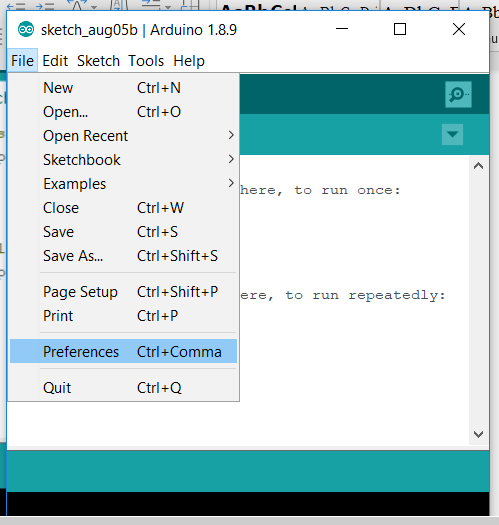
- Open the File > Preferences menu item.
- Enter the following URL in Additional Boards Manager URLs:
“https://mcudude.github.io/MiniCore/package_MCUdude_MiniCore_index.json“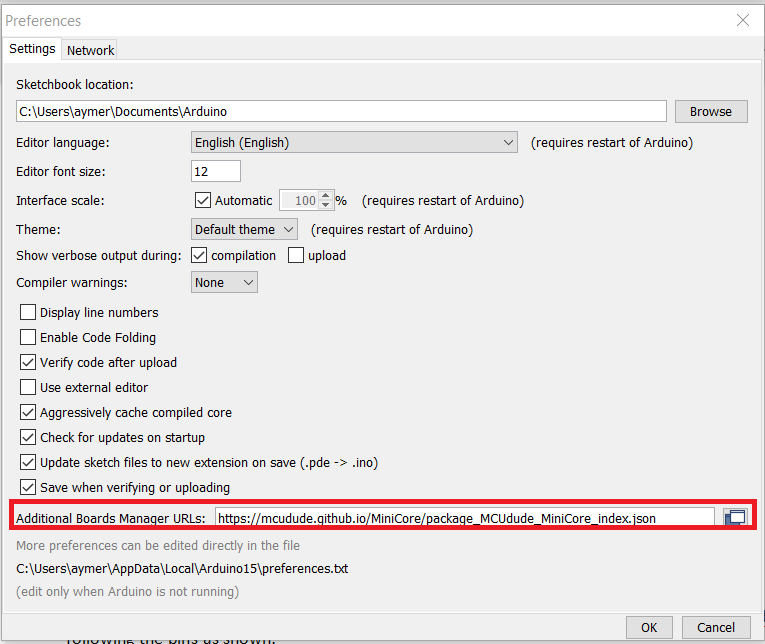
- Open the Tools > Board > Boards Manager… menu item.
- Wait for the platform indexes to finish downloading.
Scroll down until you see the MiniCore entry and click on it.
Click Install.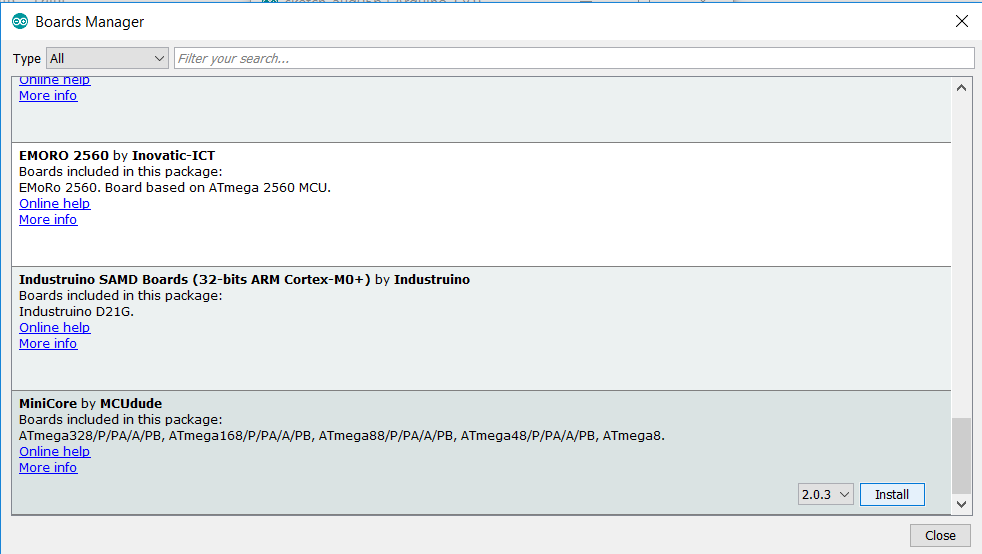
- After installation is complete close the Boards Manager window.
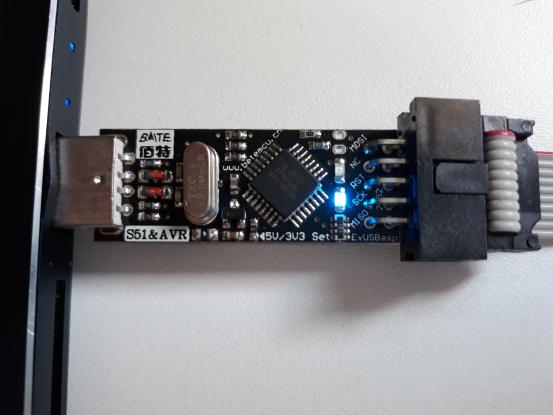
Programmer preparation
Plug the USBasp device into your computer.
If you get an error stating the USBasp cannot be found,
use Zadig to download the device driver.
Go to : https://zadig.akeo.ie and download the software. Once downloaded
Launch the software and go to Options>List all devices
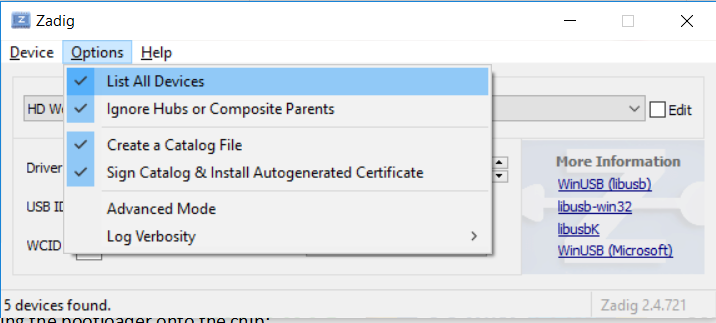
In the drop-down menu, select USBasp.
Then in the Driver selection click the small arrows until you find “libusbK (v3.0.7.0)”
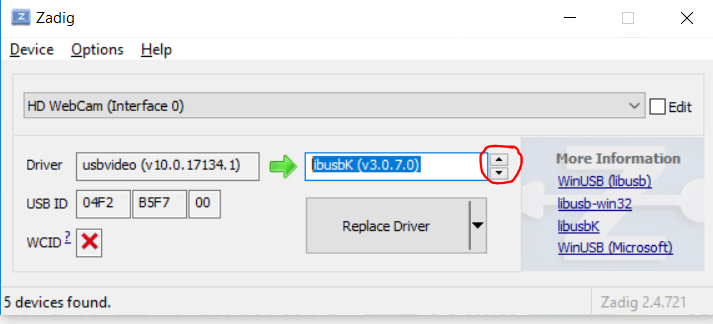
Then click “Replace Driver”
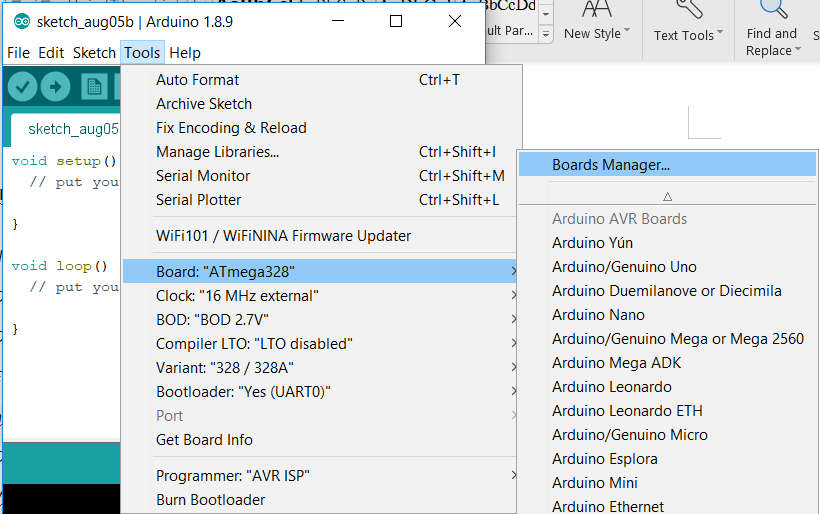
Burning the Bootloader onto the chip
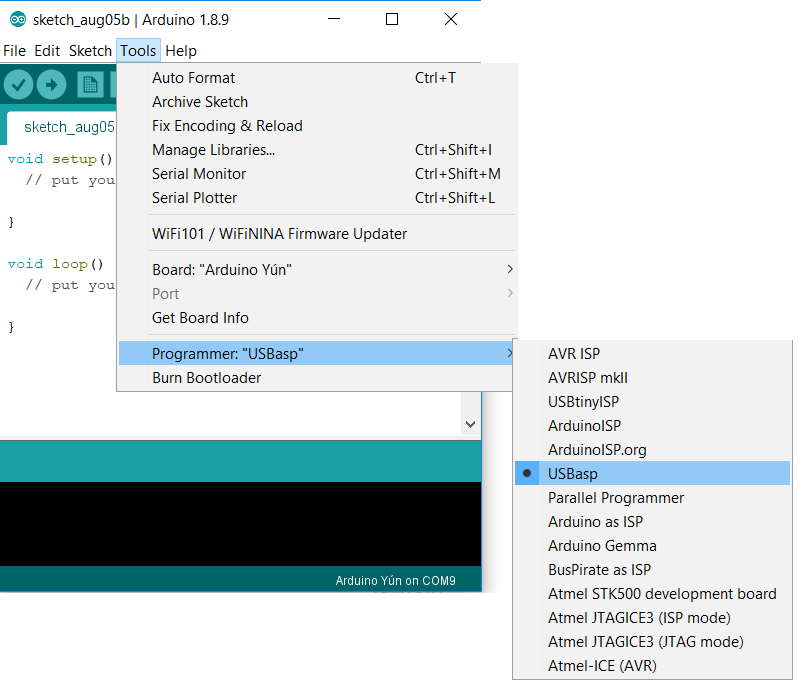
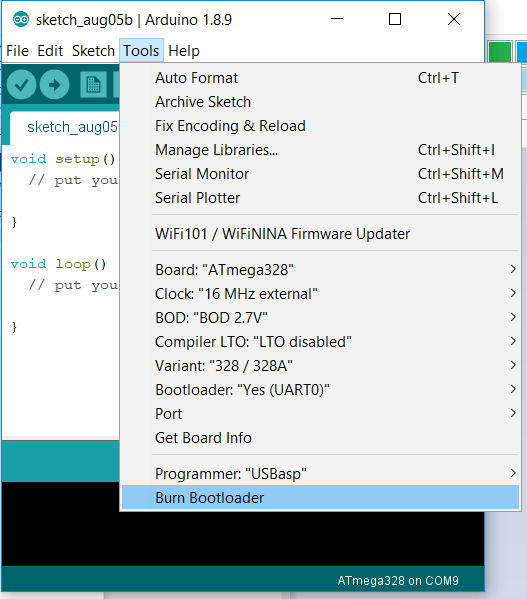
Inside of Arduino IDE go into Tools>Programmer>USBasp
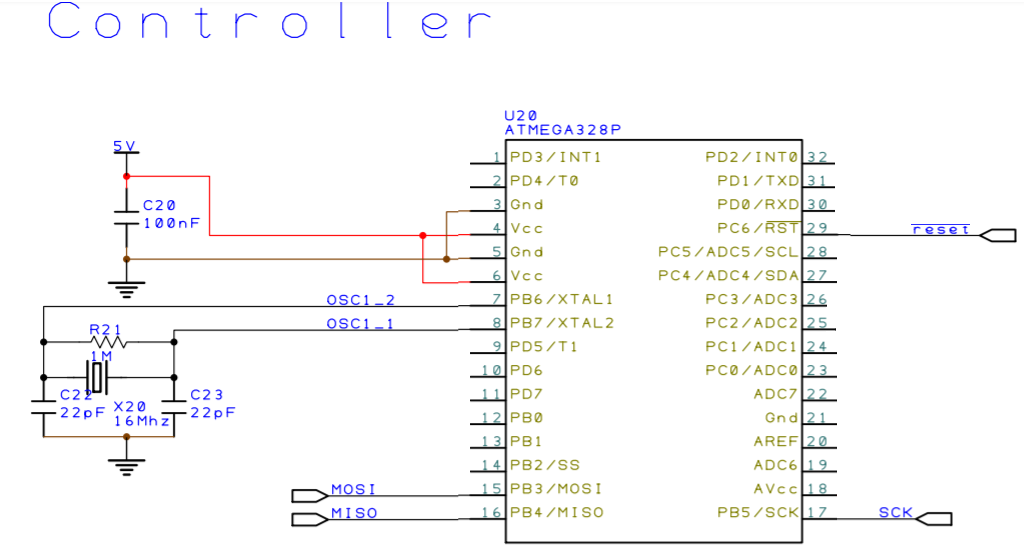
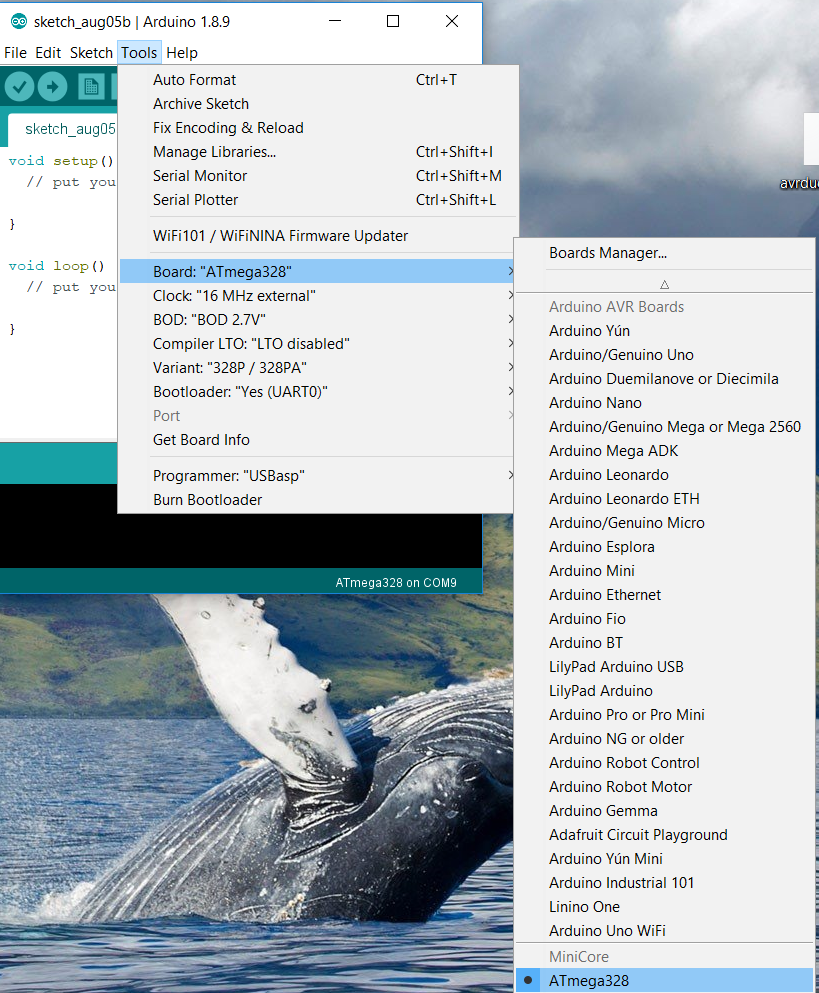
Select the board ATmega328
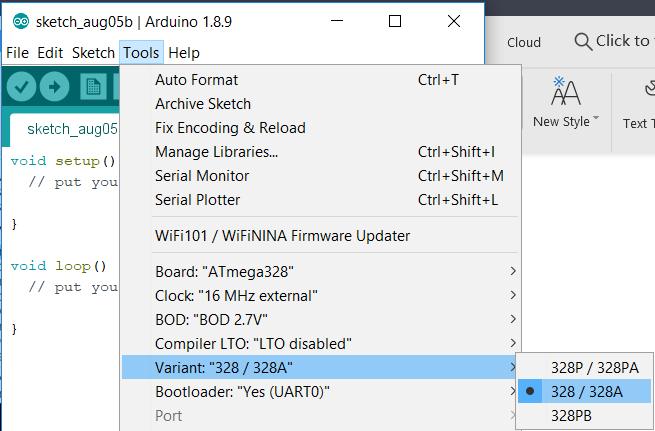
and select the variant 328/328A
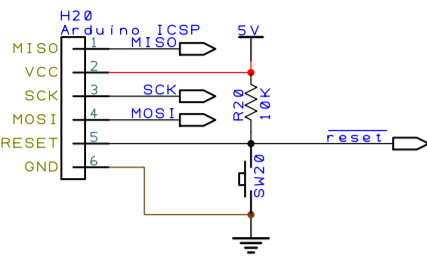
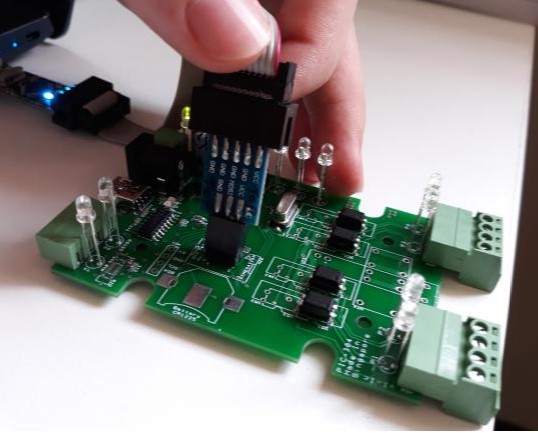
Connect the USBasp to the Arduino programming port (6 pins header)
Go to Tools>Burn Bootloader
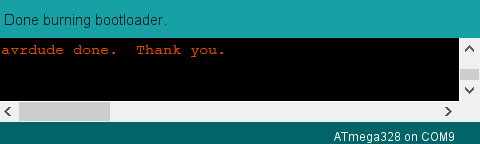
You should see this message in the console.
A quick way to check if the boot-loader was correctly burned is to try loading with an empty source code.
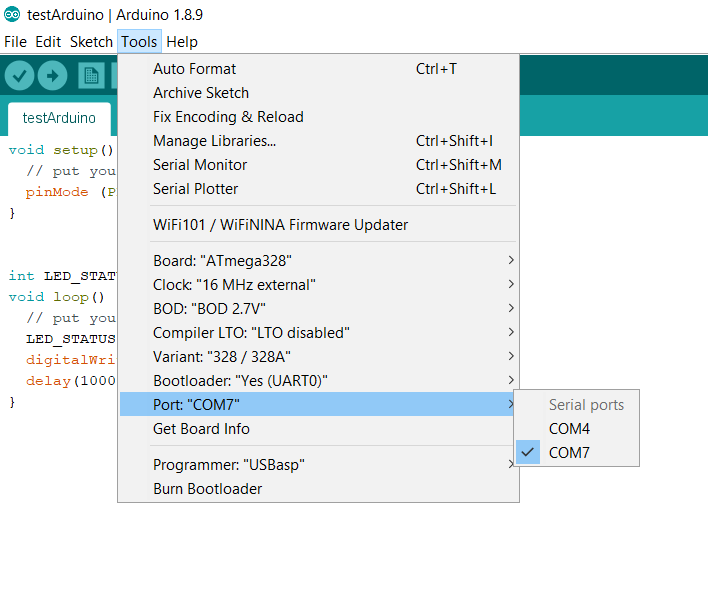
If the loading fails, try changing the port in Tools>Port. If the loading still not works, try redoing step 3. for the start.
Arduino programming via USB
You can program the board using a USB B mini, just like you would a normal Arduino Board.
For this you need to change the port if necessary: Tools>Port
Use the Check button to compile ans the arrow to load the code onto the board.
Set up:
The pins of the USBasp must be connected to the corresponding of the Arduino ICSP connector.