This is a simple and safer way to upload your compiled firmware onto a microchip microcontroller.
A second method is loading the project source code files, compile and load. It is not a preferred method for uploading as the source code may be accidentally edited.
The following is the recommended method to load firmware safety.
Checklist before proceeding.
- A computer with USB port.
- IPE software installed on your computer.
- PICKit programmer hardware.
- The *.hex file of your project.
- Your microcontroller board.
Installing IPE Software
IPE software (Integrated Programming Environment) is a tool from Microchip that allows you to upload your compiled firmware the the microcontroller.
Visit this page to download MPLAB X IDE from Microchip website.
https://www.microchip.com/en-us/tools-resources/develop/mplab-x-ide
- Visit this page to download MPLAB X IDE from Microchip website.
https://www.microchip.com/en-us/tools-resources/develop/mplab-x-ide - Install this application.
- Please take note to select the following options during the installation process.
- “MPLAB IPE”
- “8 bit MCUs”
- “16 bit MCUs”
Loading Firmware to Microcontroller.
This section will guide you in programming your controller board.
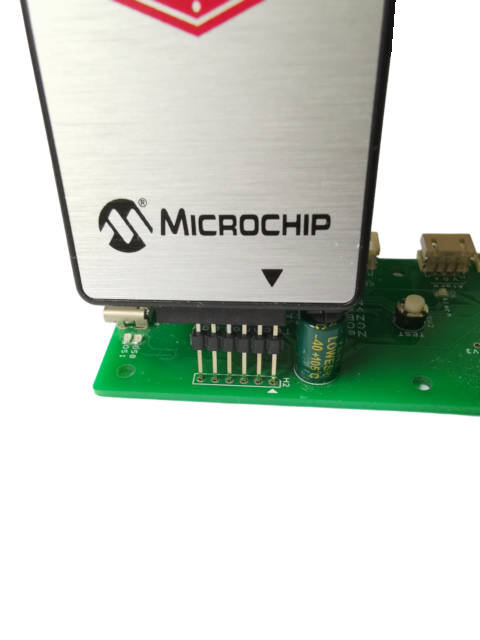
Step 1:
Connect the PICkit programmer tool to your controller circuit board.
Ensure that pin 1 (which is indicated by the triangle arrow marking) is aligned with the same marking on the circuit board.
Step 2:
Open up the “MPLAB IPE” software.
Select the “Family” and “Device” names for your controller board.
eg.
Family: 16-bit MCUs (PIC24)
Device: PIC24FJ256GA702
Click on the “Apply” button to select.
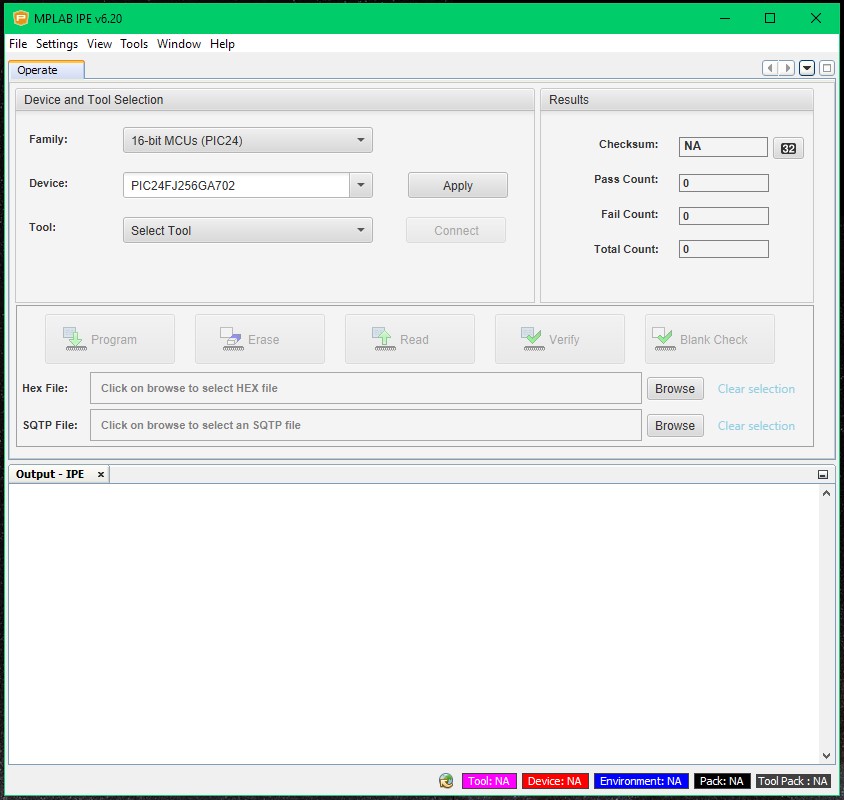
Step 3:
Connect up your USB PICKit tool to your computer.
Select the “Tool” for your PICkit programmer tool.
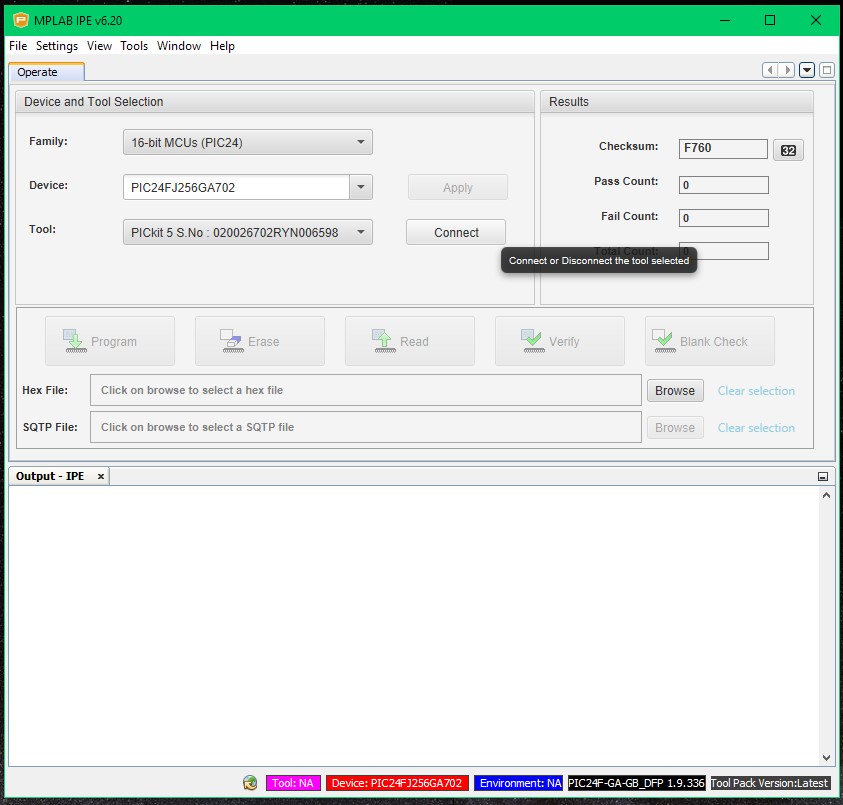
Step 4:
Under the section “Hex File”, click on the button “Browse” to select the *.hex file that you want to load to your controller.
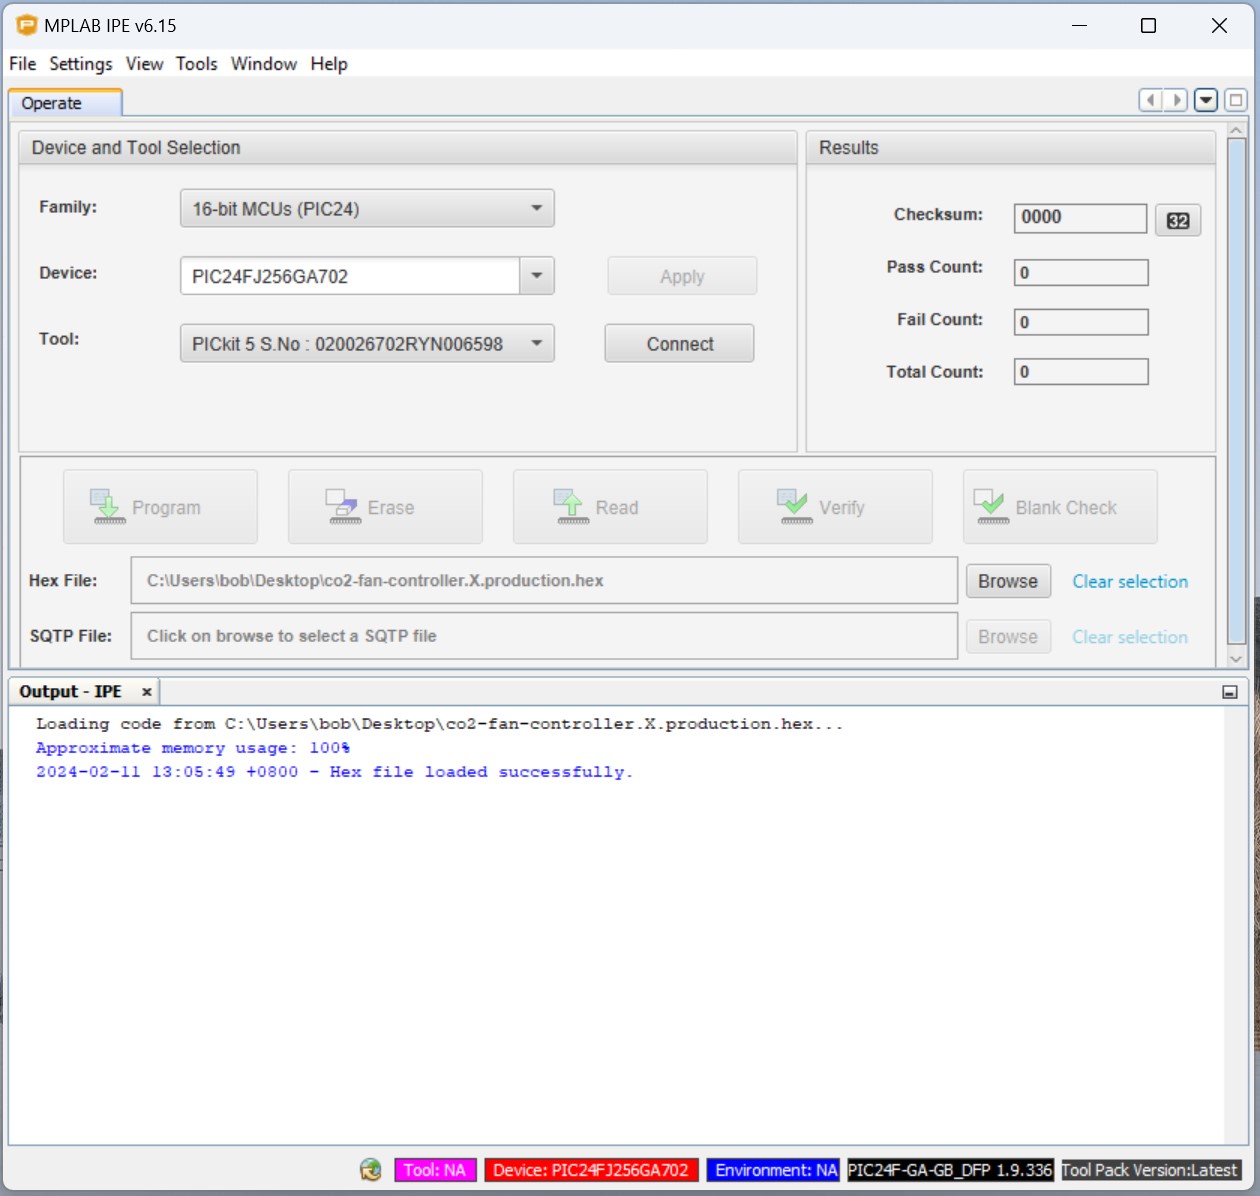
Step 5:
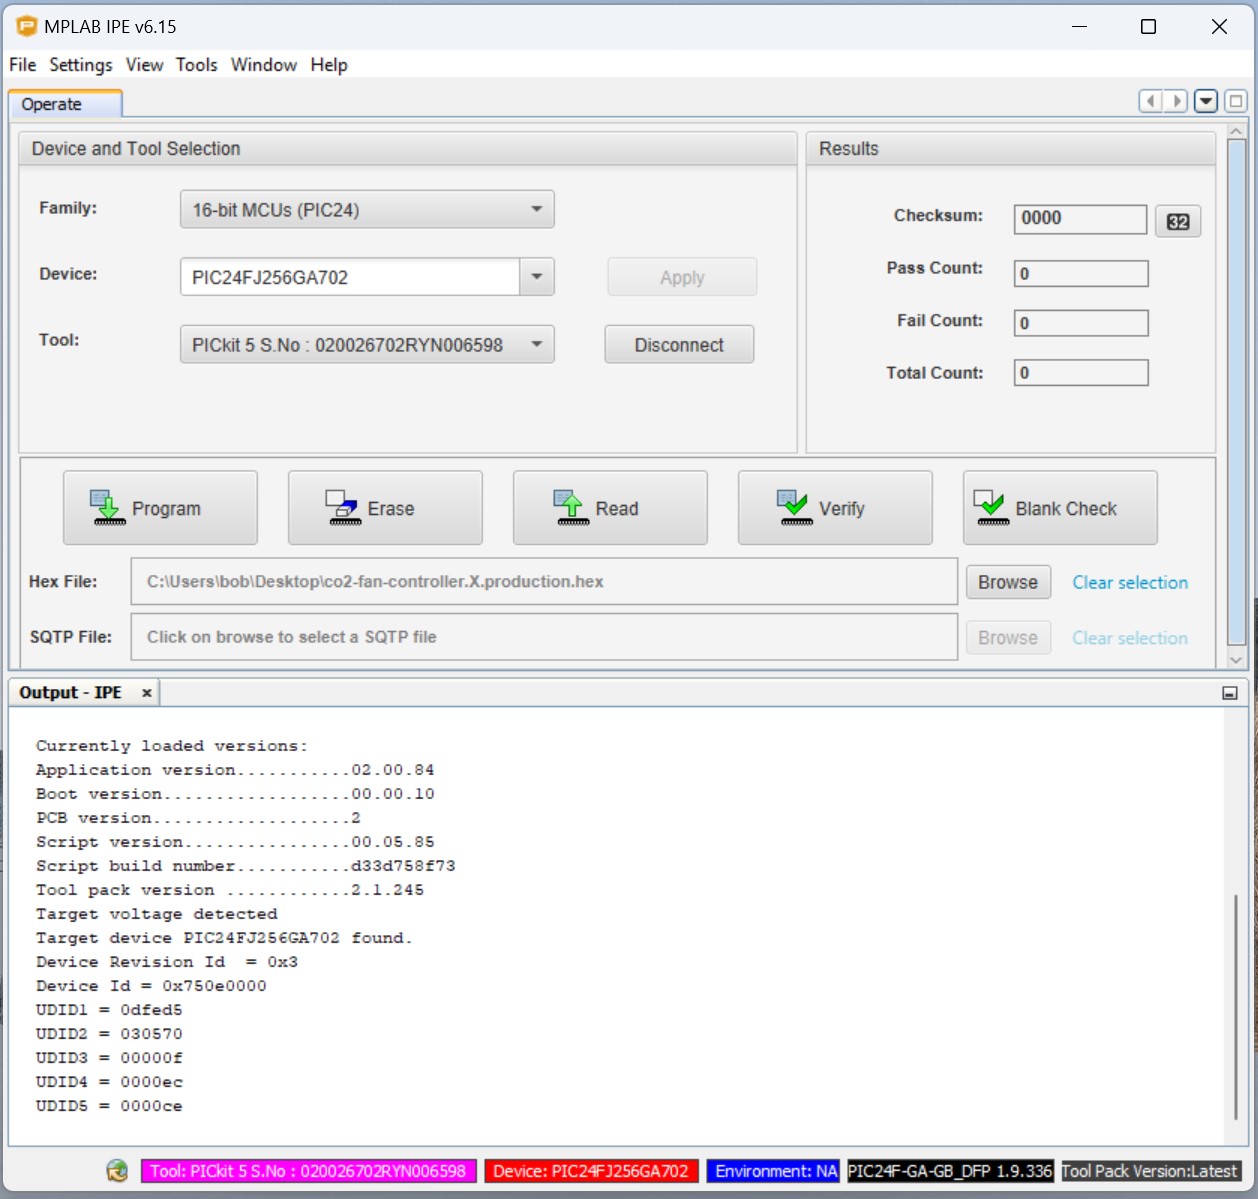
Ensure that the pins on the PICkit programmer tools are properly connected/touching your controller board, by the programmer with some pressure.
Then click on the “Connect” button.
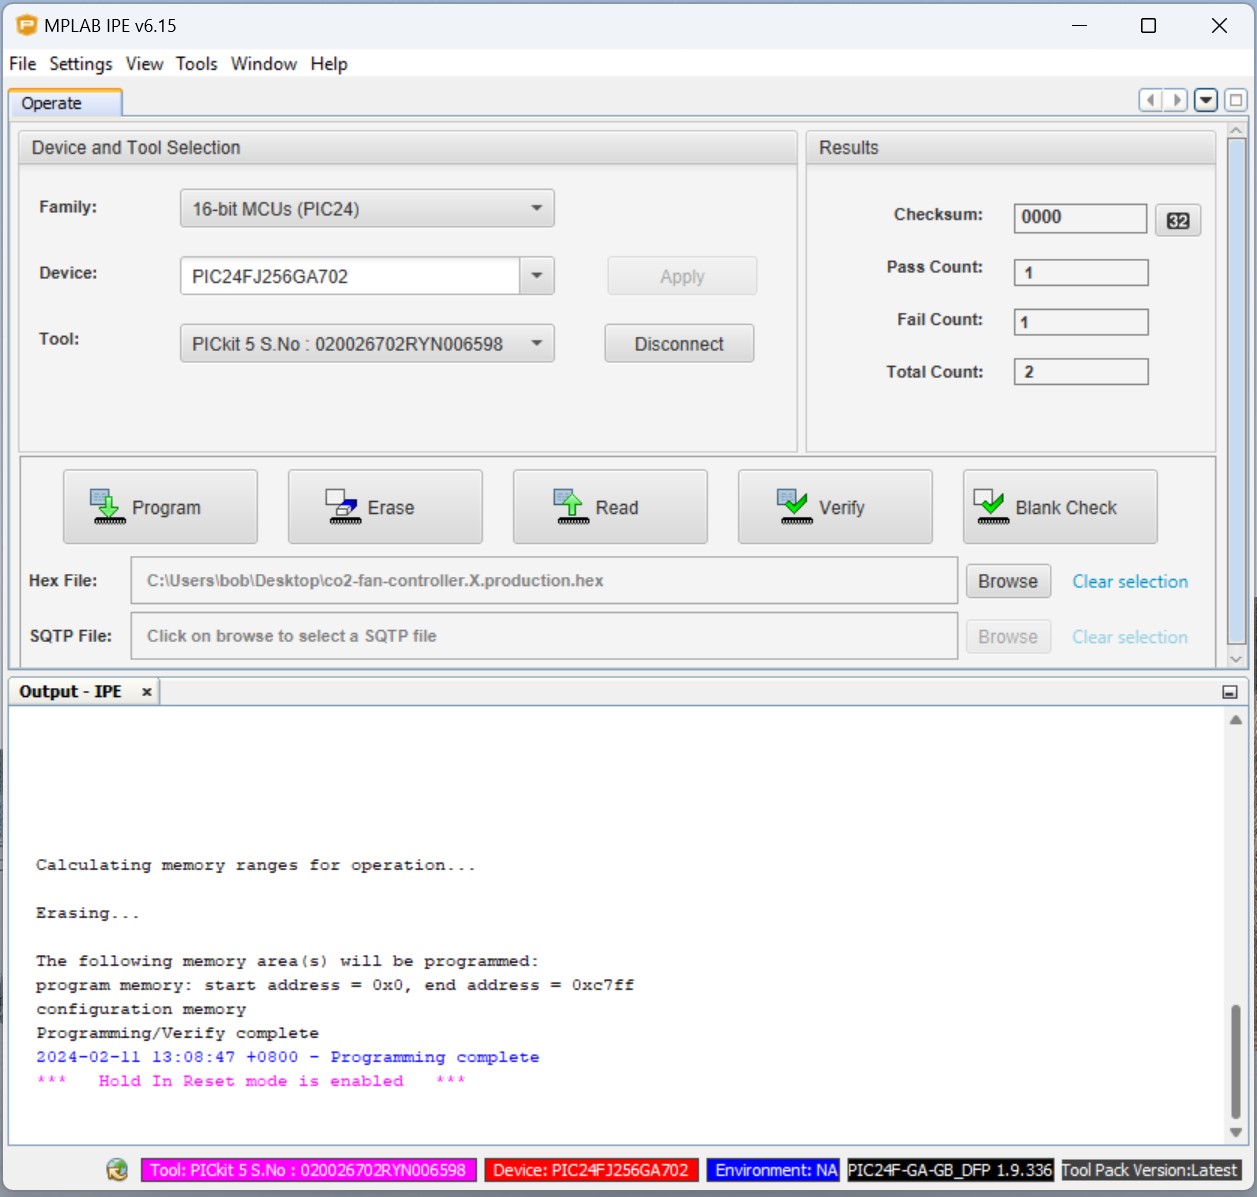
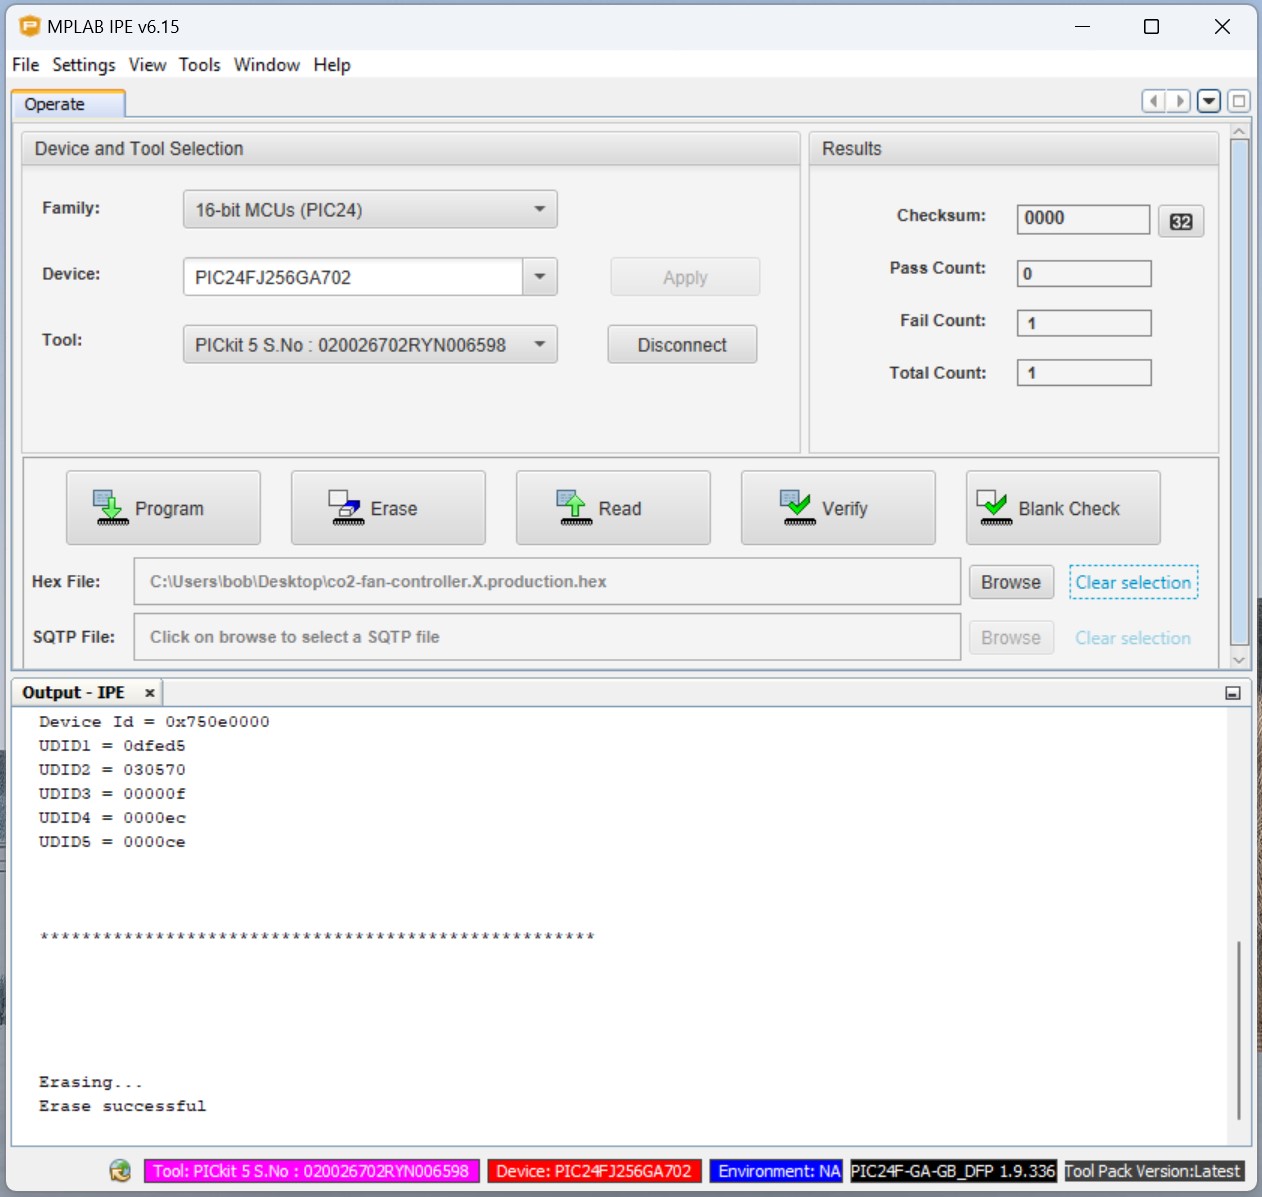
Step 6:
Maintain contact of the PICkit programmer tool with the controller board, then click on the “Erase” button.
You should see on the output window that the erase operation is completed successfully.
Step 7:
Maintain contact of the PICkit programmer tool with the controller board, then click on the “Program” button.
Messages will be displayed on the output window to indicate that the programming is done successfully.